Welcome to the Virtual Induction Passport information guide
This site will give you information about how the Virtual Induction Passport (VIP) system works, both as a user and as an administrator. You have recently been sent login information in order for you to access the system and see how it works for yourself.
Please select the tabs below to access more information about how each part of the system works.
Key Points
The Virtual Induction Passport:
- provides an induction pathway that is time bound for every role with instant compliance rates by role
- uses revalidation to alert doctors as to when they have to do training again and if the don't the reporting system will show non-compliance
- is an intuitive system to support doctors in training
- provides greater support and access to educational material for doctors in training
- provides educational material that is patient focused and accessible on any device
- provides instant oversight and assurance and instant reports on non-compliance by location and role
- tracks mandatory doctors training by role
- manages hundreds of pathways through a simple interface reducing administration burden of pathway management
- supports doctors in training by knowing what pathway they undertake based on location, role, speciality and sub-speciality
- combines education material and scenarios with a system that manages rotation and pathways of doctors
- uses learnPro as the core system therefore bringing in revalidation and sync with eESS and empower systems
- manages the movement of doctors from one location (board) to another using a course equivalency grid
- has an optional section eg. paediatric prescribing, VIP provides the opportunity for the doctors to do other modules relevant to their role that are not mandatory and categories as optional
User View Guide
Follow these steps to see how a user would access the VIP system:
-
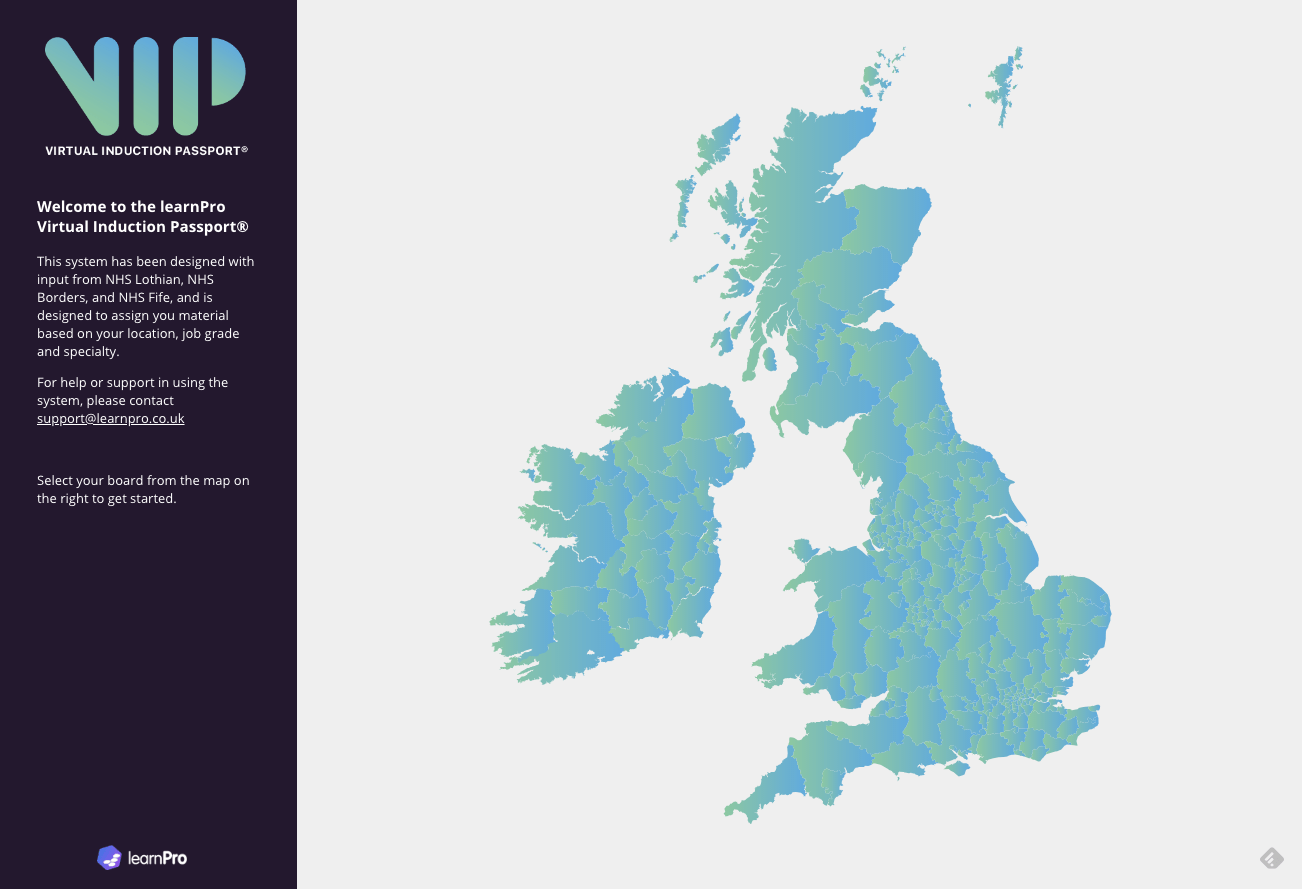
Step 1: Locate your board or trust by selecting your area on the map.
-
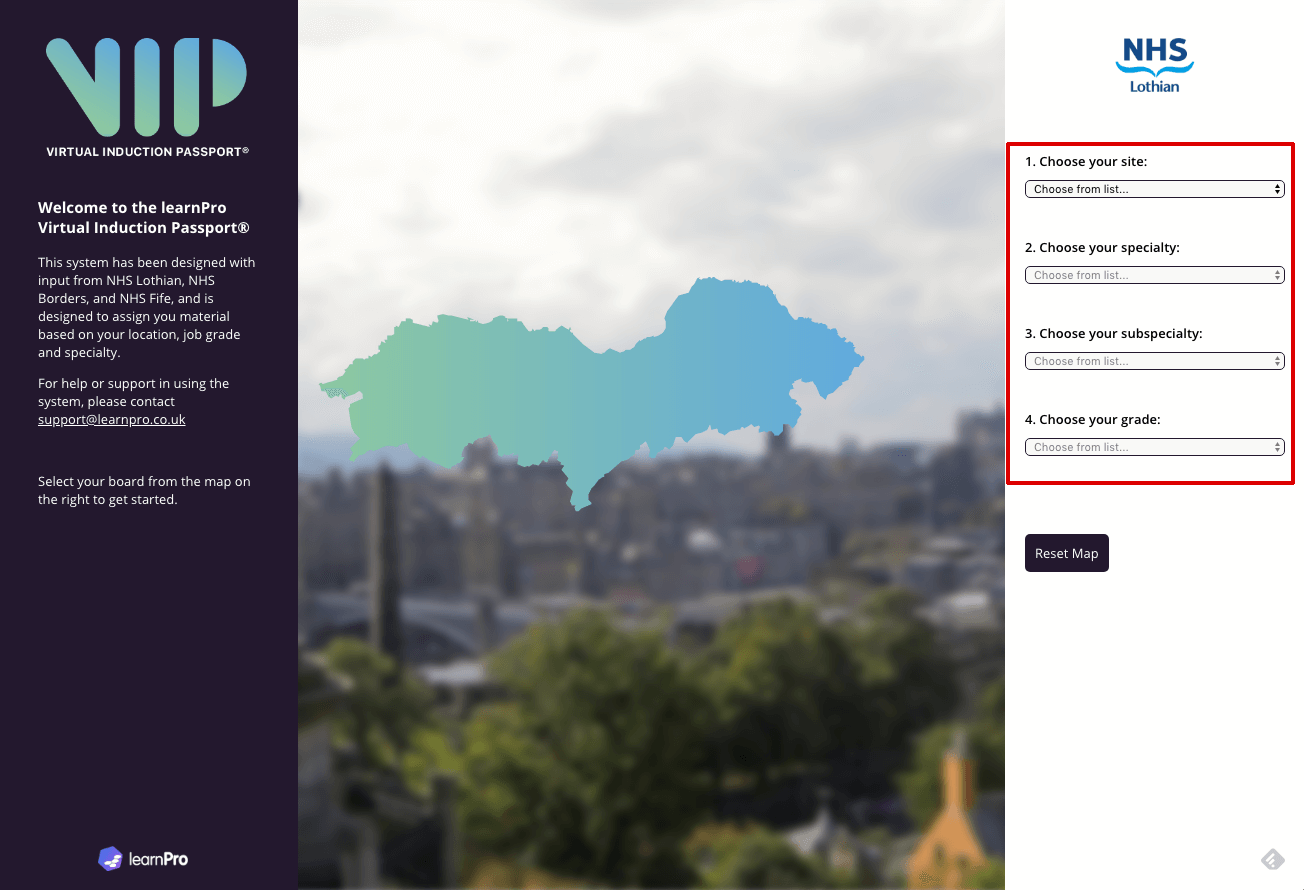
Step 2: On the right hand side of the screen your location pathway options will appear. Please note: The locations, specialties, subspecialties and grades are all setup for this demo and can be customised for your location.
-
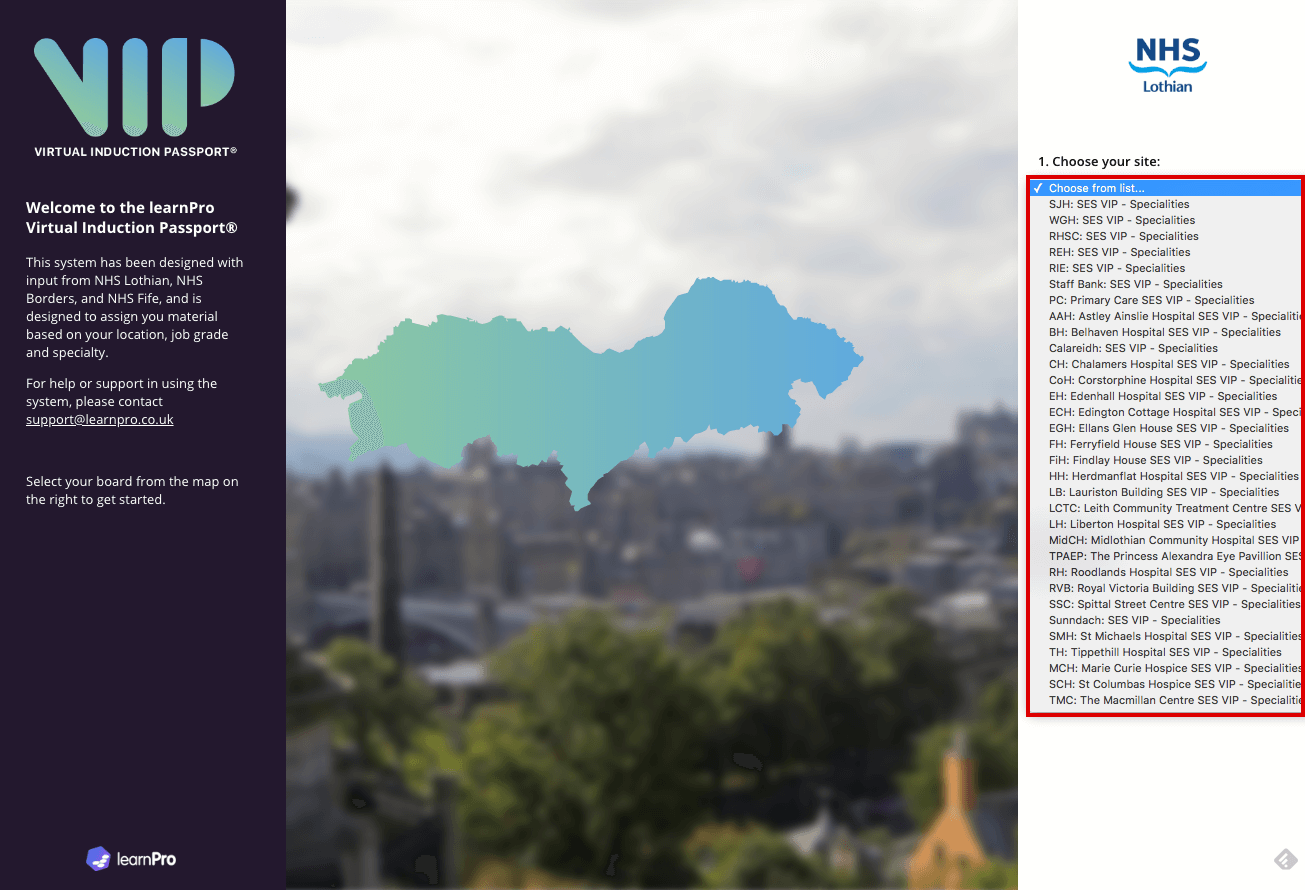
Step 3: Choose your site. Please note: This can be customised for your location.
-
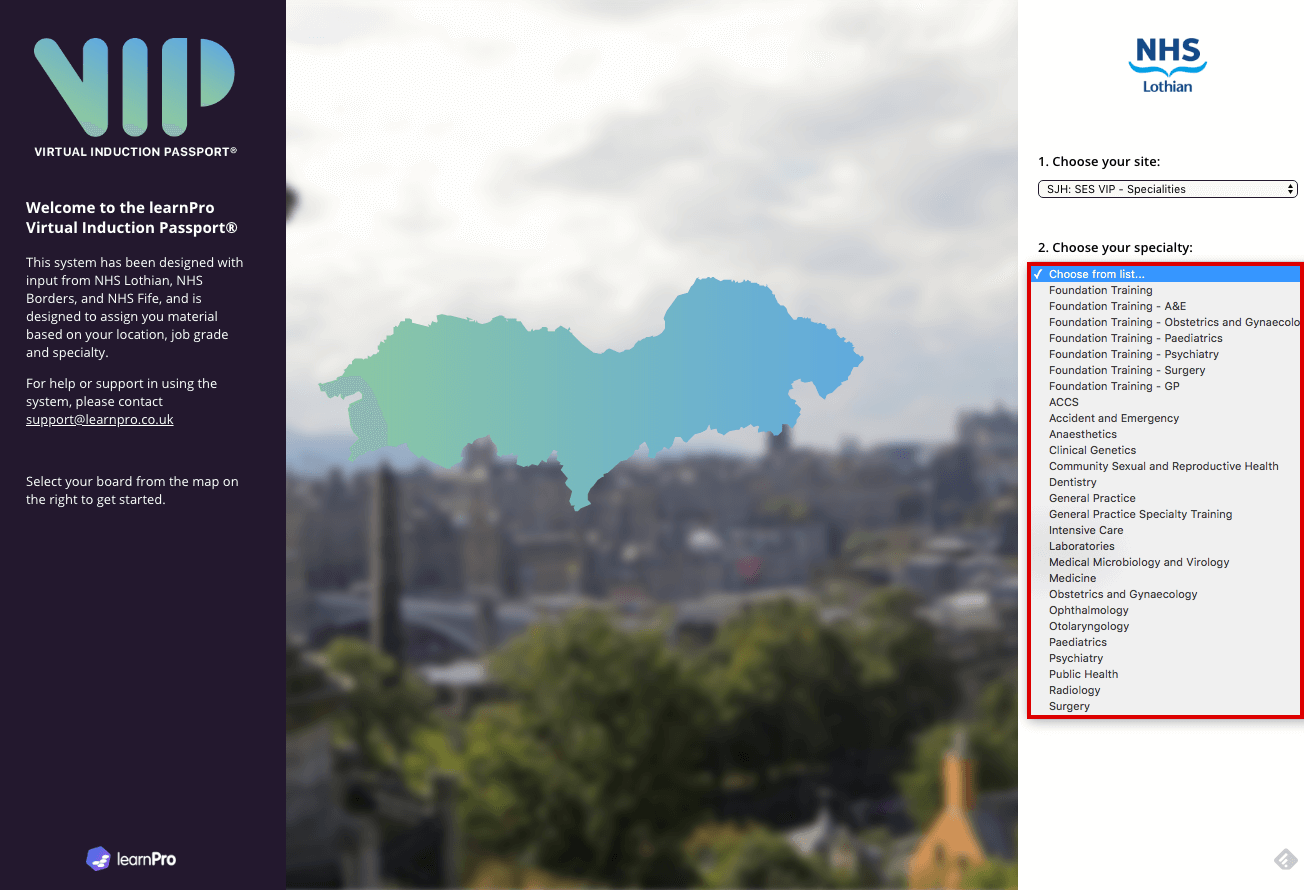
Step 4: Choose your specialty. Please note: These can be customised for your location
-

Step 5: Choose your sub-specialty. Please note: These can be customised for your location
-
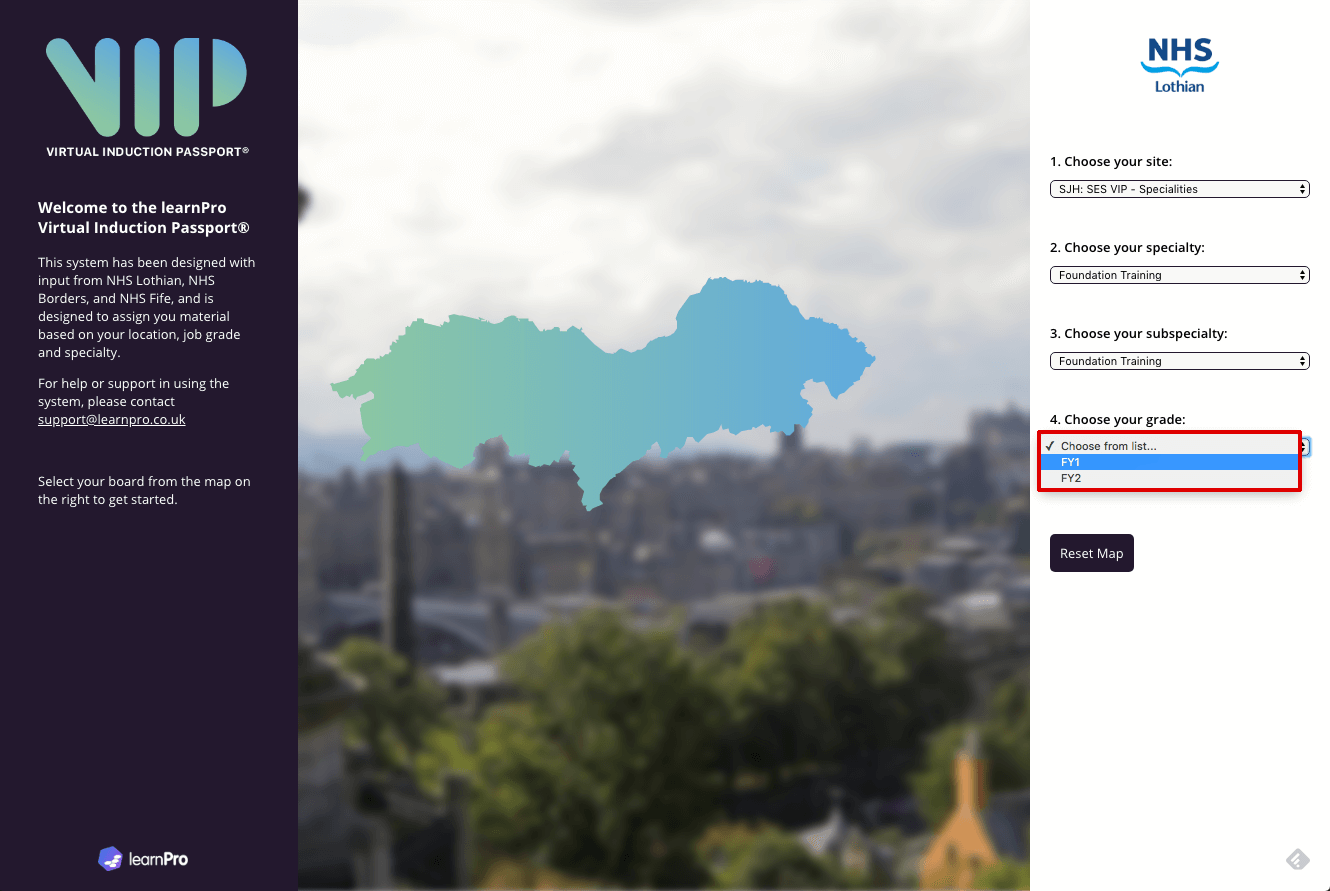
Step 6: Choose your grade. Please note: These can be customised for your location
-
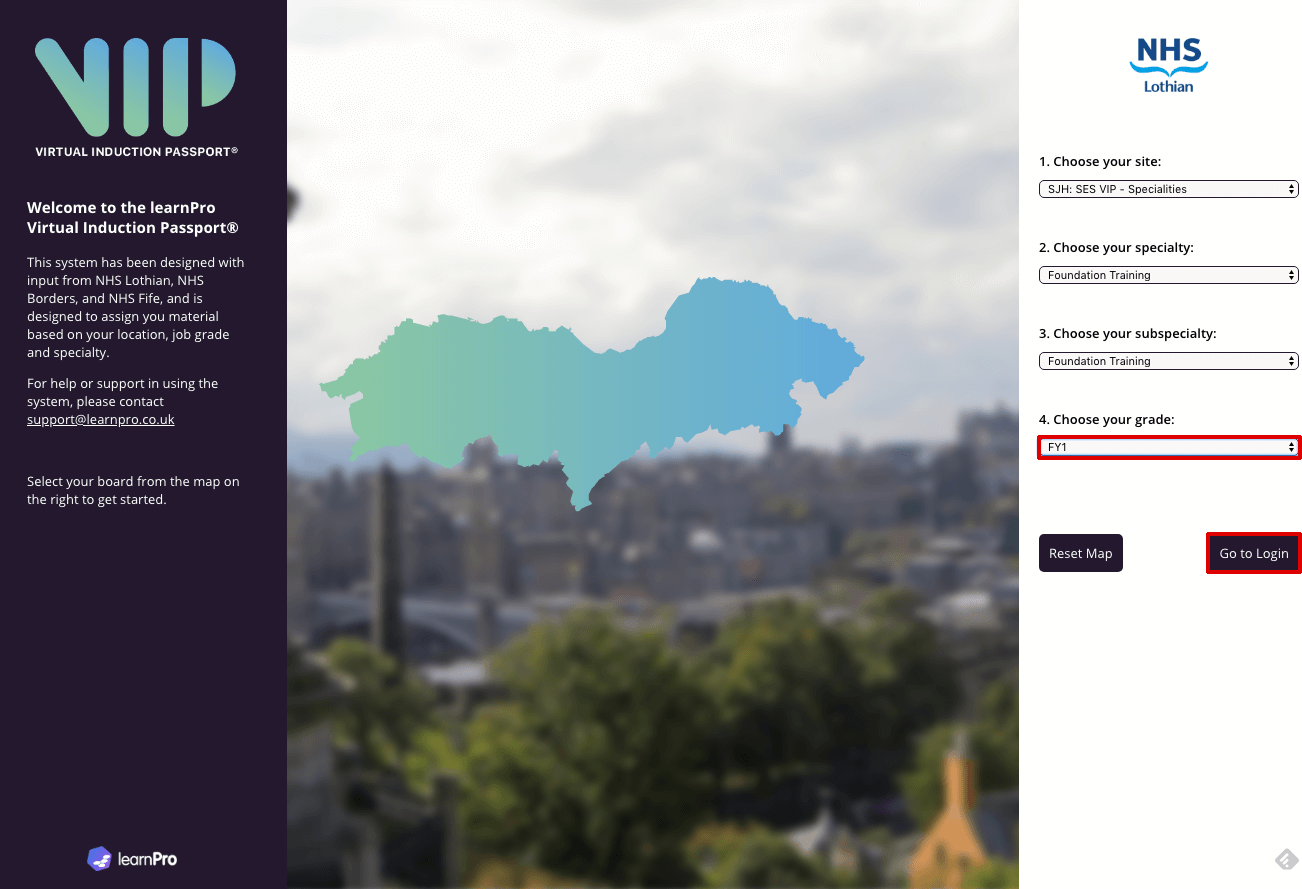
Step 7: Once you have selected all the relevant information you can now login to the learnPro system. This will then automatically assign you the correct learning for your specific role.
-

Step 8: If you already have an account on learnPro you can log in. If you don't have an account you can create one from this screen.
-
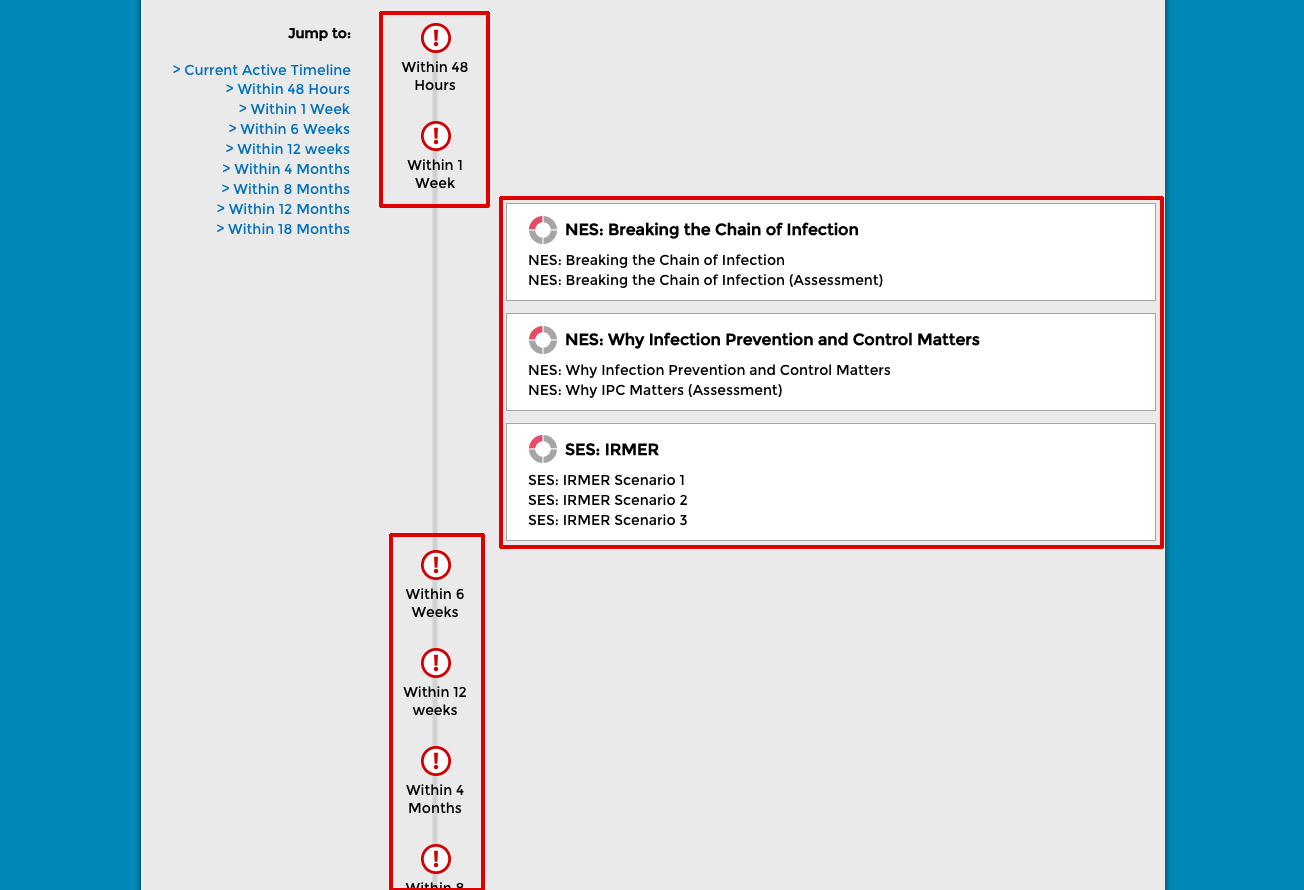
Step 9: Once you have logged in you will see a timeline similar to the screenshot below. This will have all the time-bound learning you need to complete when you start your post. By clicking the timescales you can get an overview of all the learning you will need to complete. The screenshot below shows that the learning has not been started. To begin, click on the one of the courses you wish to complete.
-
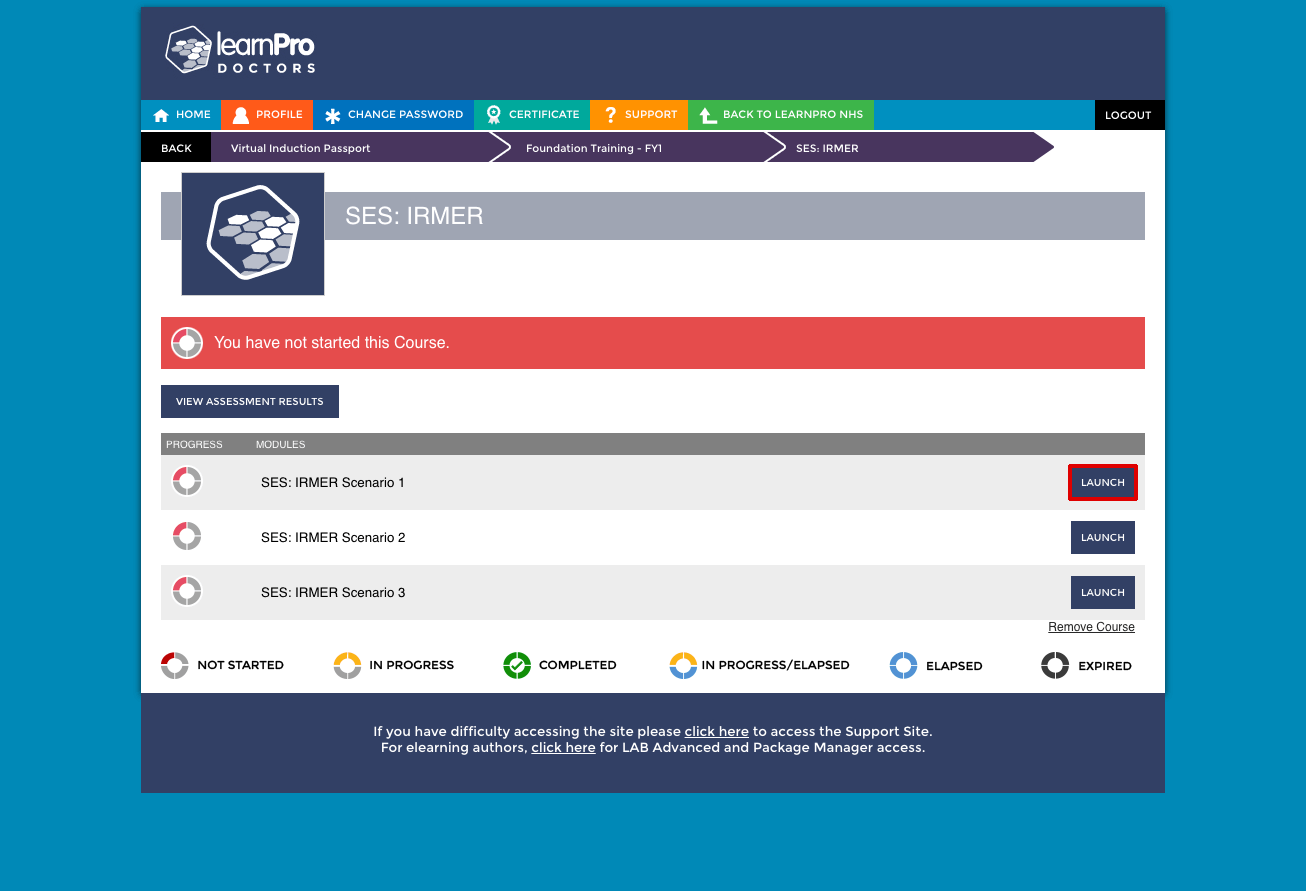
Step 10: Each course is broken down into a selection of modules. The screenshot below shows 3 IRMER modules to pass in order to complete the course. Click 'Launch' to access the module.
-
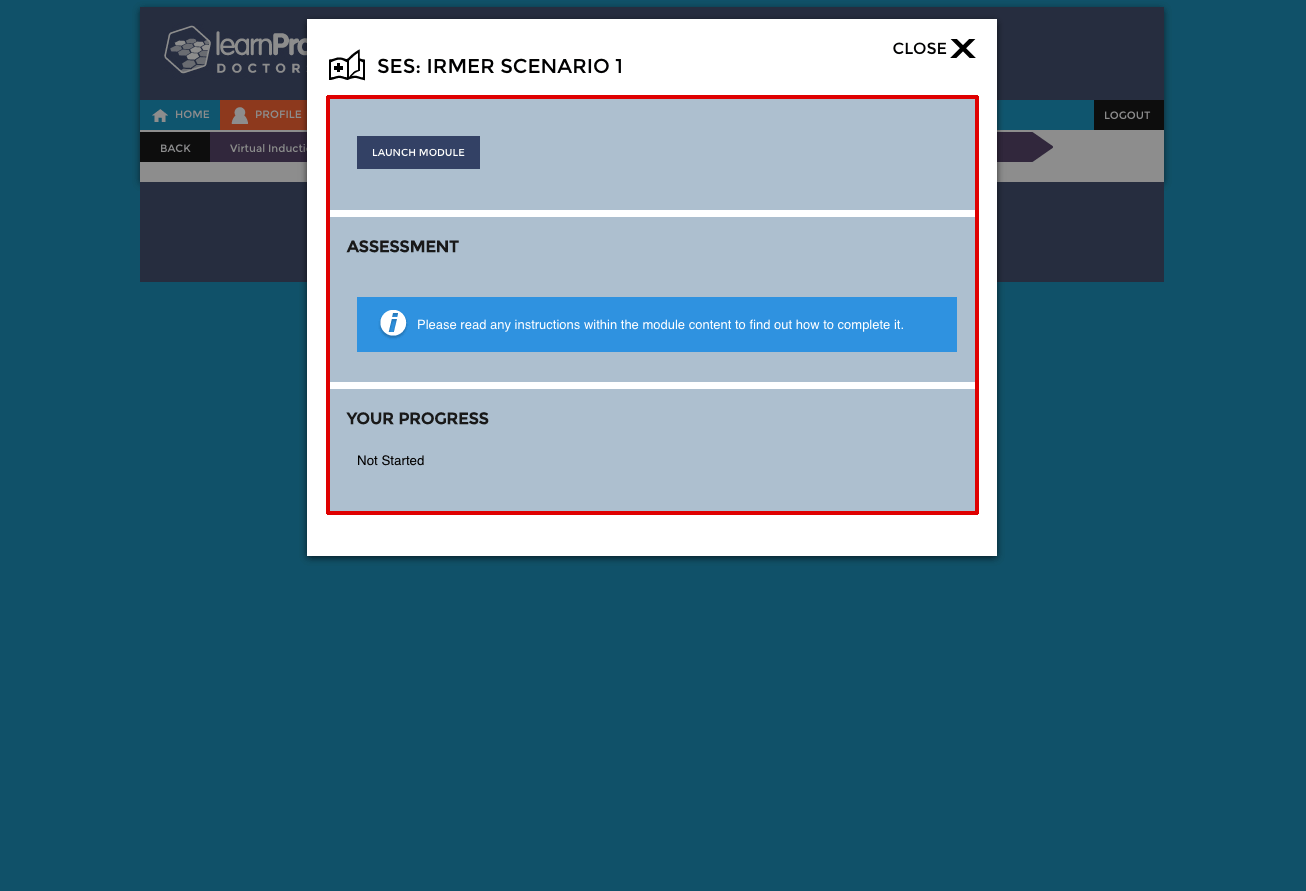
Step 11: A dialog box similar to the one on the screenshot below will appear. From here you can launch the module, get information about the assessment, and the status of the module.
-
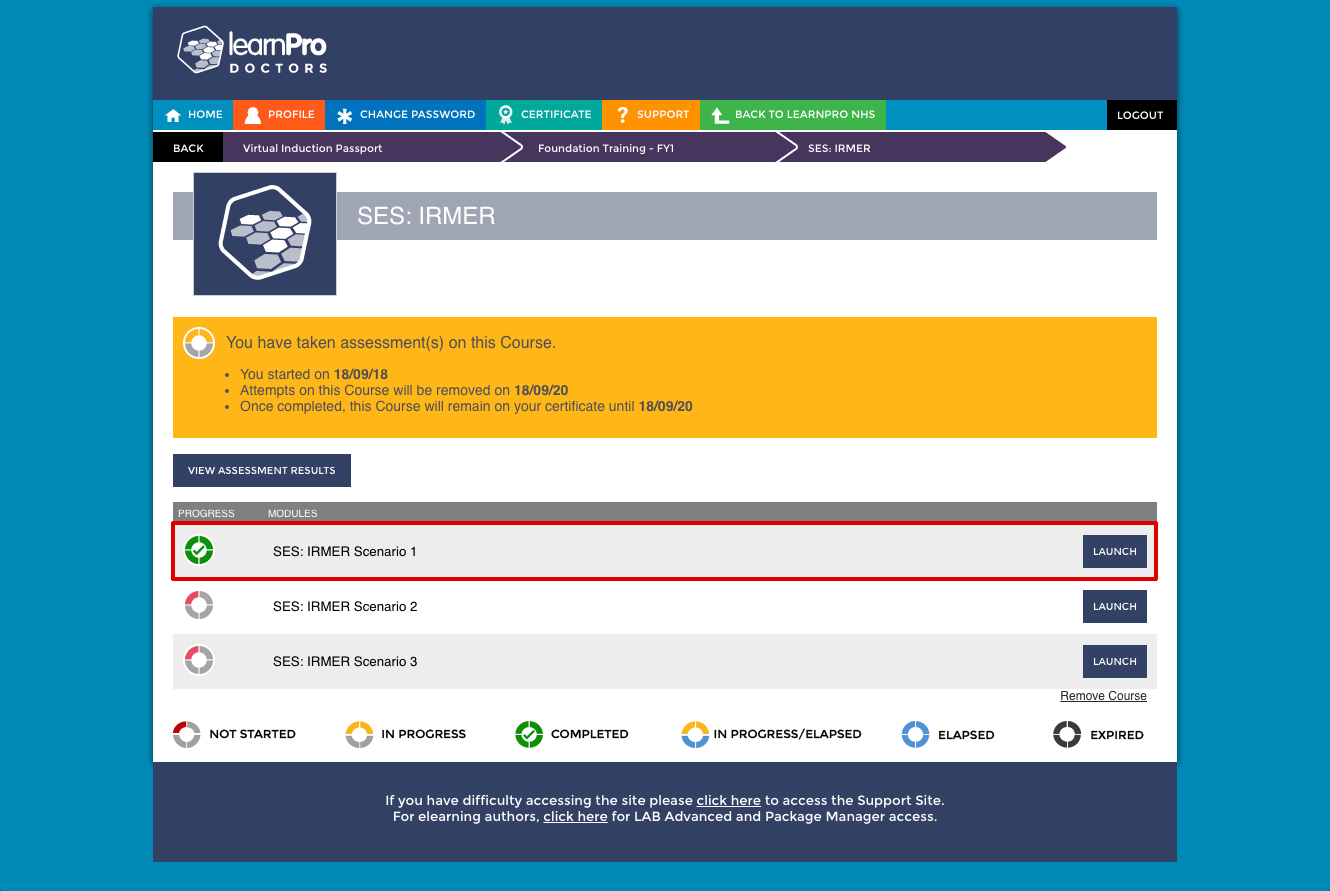
Step 12: Once you have completed the module, it will appear as complete on your profile, similar to the screenshot below (marked in red). Work through the other 2 modules to complete the course.
-

Once the course is complete, it will appear complete on your timeline (see screenshot below).
-

You can try this out for yourself by visiting http://vip.learnprouk.com and following the previous steps. Please use the login that you have been sent.
Admin Features
Find out what administrators can get access to via the VIP administration system
-

REPORT DASHBOARD: The VIP system allows administrators to measure compliance for their location. The screenshot below shows an overall report for compliance on the Fire Safety module within the Foundation Training FY1 pathway between the dates shown.
-
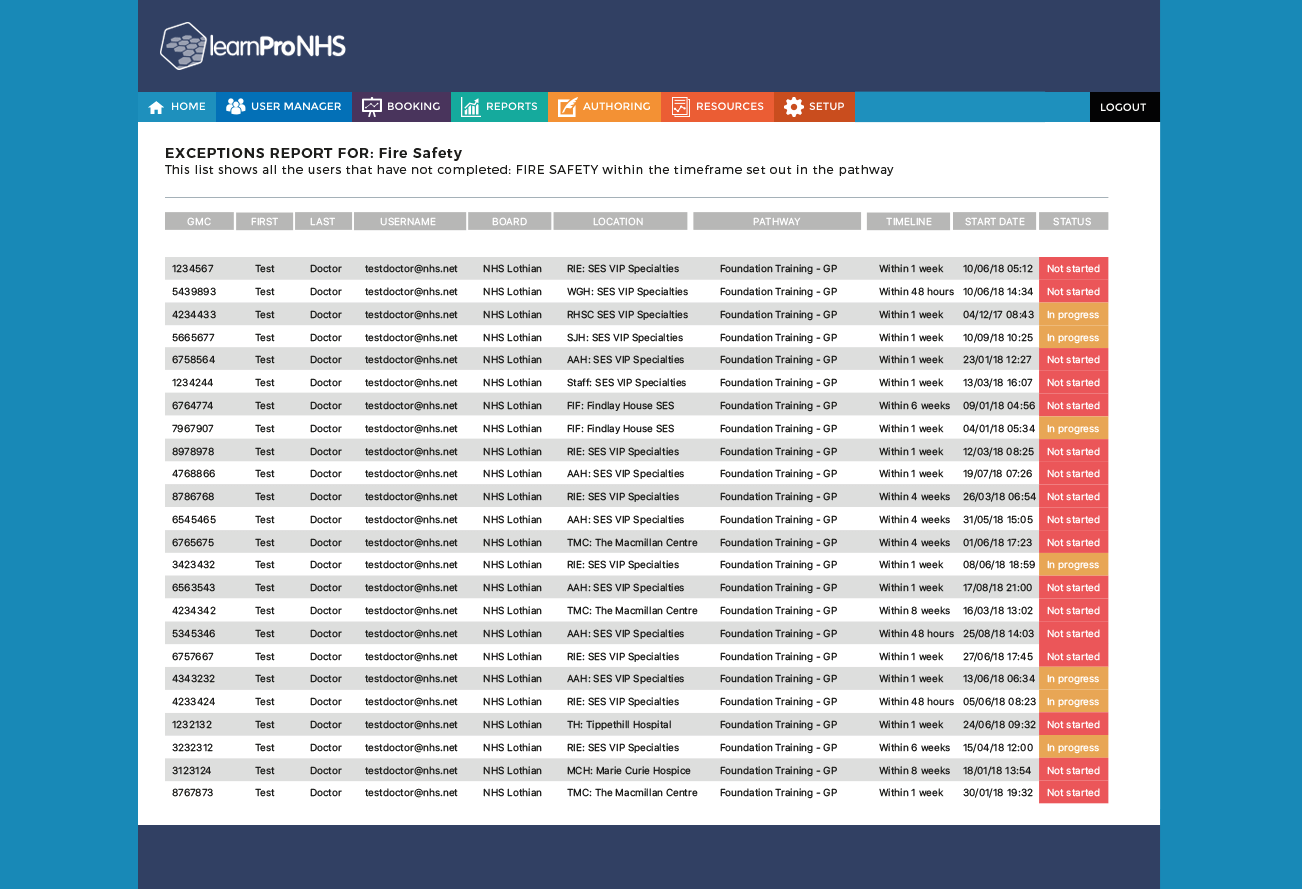
EXCEPTIONS REPORT: The screenshot below shows a list of outstanding users who have not completed the learning in the correct timescale. These reports can be accesed for any pathway.
-

COURSE CATALOGUE: As part of the VIP system, we have a selection of modules available on our course catalogue that you can download and edit using our online authoring tool, LAB Advanced.
-
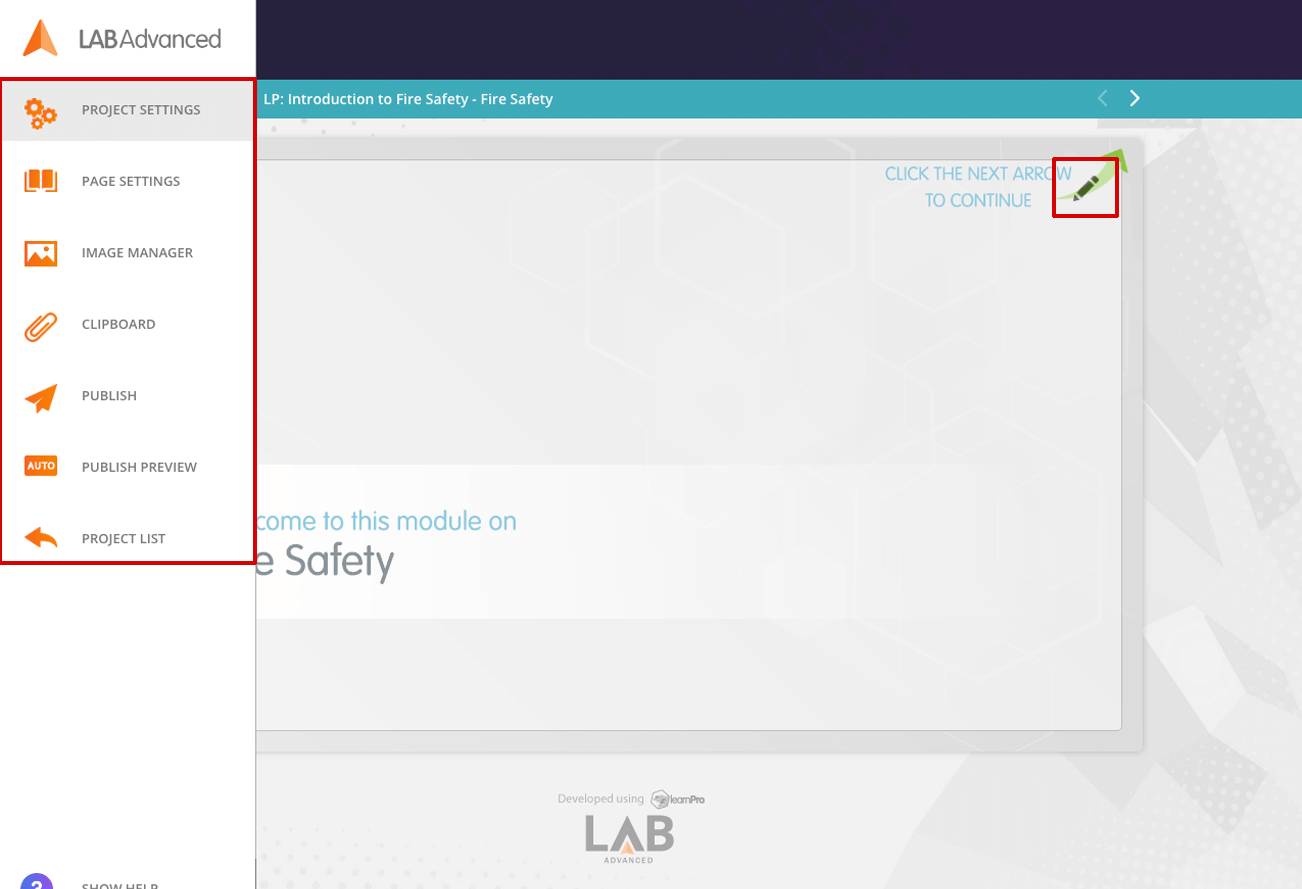
EDIT MODULE USING LAB ADVANCED: On the screenshot below, the areas marked in red show how LAB Advanced can be used to edit and update the existing mandatory modules. LAB Advanced allows administrators to make changes to text content (for example: adding local policies), uploading and changing images, adding relevant videos, building assessments and creating engaging interactions.
-
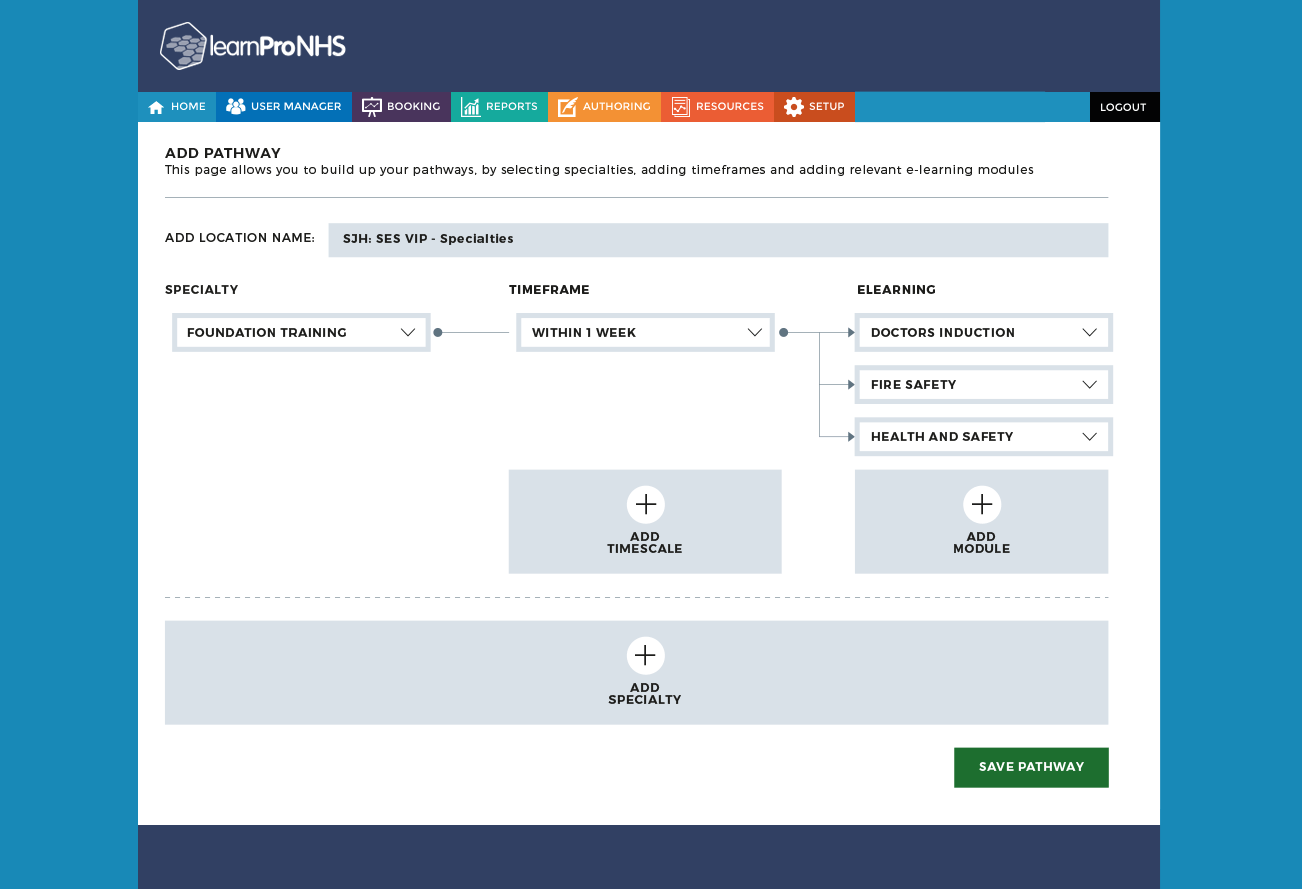
ADD A PATHWAY: With your administration rights you can add and edit your own pathways revelant to your location using the interface shown below. We have a selection of modules ready to be added to your pathways, but you can also upload your own modules to the learnPro learning management system.
-
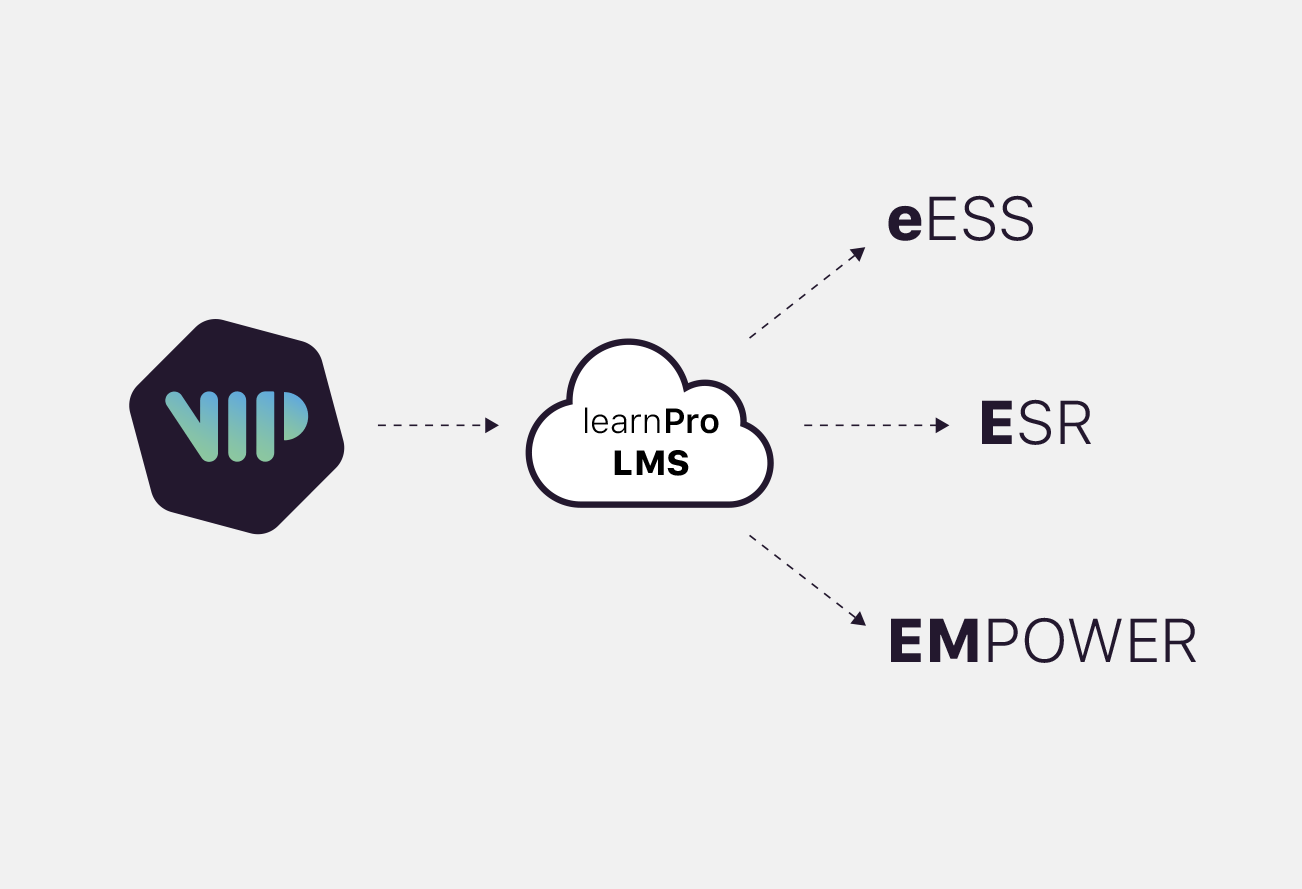
SYNC API: The learnPro synchronisation API allows assessment results and other key user data to be securely transferred to any HR or electronic staff record system. learnPro currently interfaces with a number of complex data systems including NHS Scotland's Electronic Employee Support System (EESS) to ensure that staff records are automatically updated.
Video Demonstration
The video below provides a walk-through of the current VIP system rolled out over NHS Lothian, NHS Fife and NHS Borders.